Adding a new product to your WooCommerce web shop is an easy and quick process – populating the shelves of your online e-commerce solution has never been this fast and simple!
1. Make sure that you are logged in to the Admin Dashboard
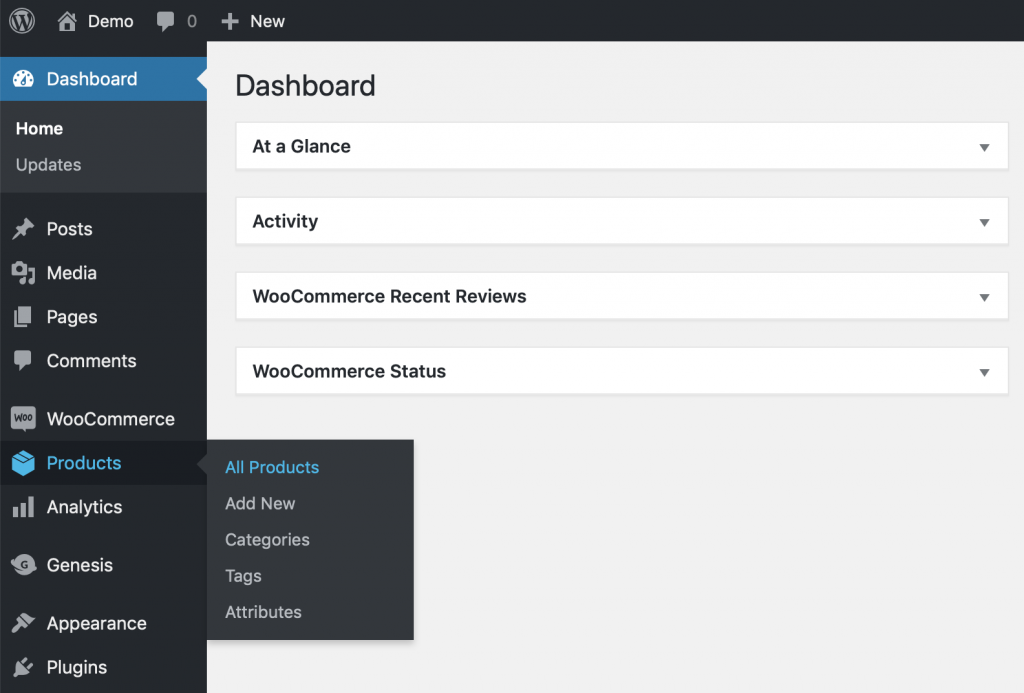
2. Click on Products and the select All Products in the left-hand side menu:
3. If your shop is empty then you will see the following screen:
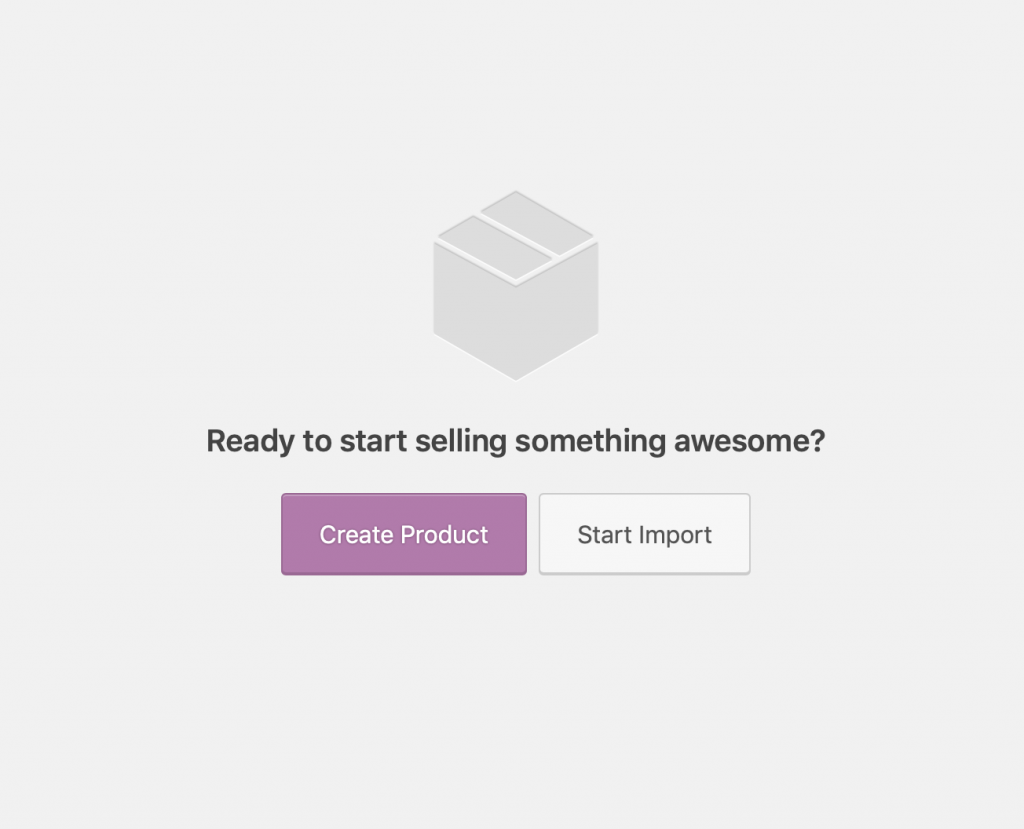
Click on the Create Product button and you’ll be greeted by the Add New Product screen, like below.
If you already have products in your store then you’ll immediately see the Add New Product screen
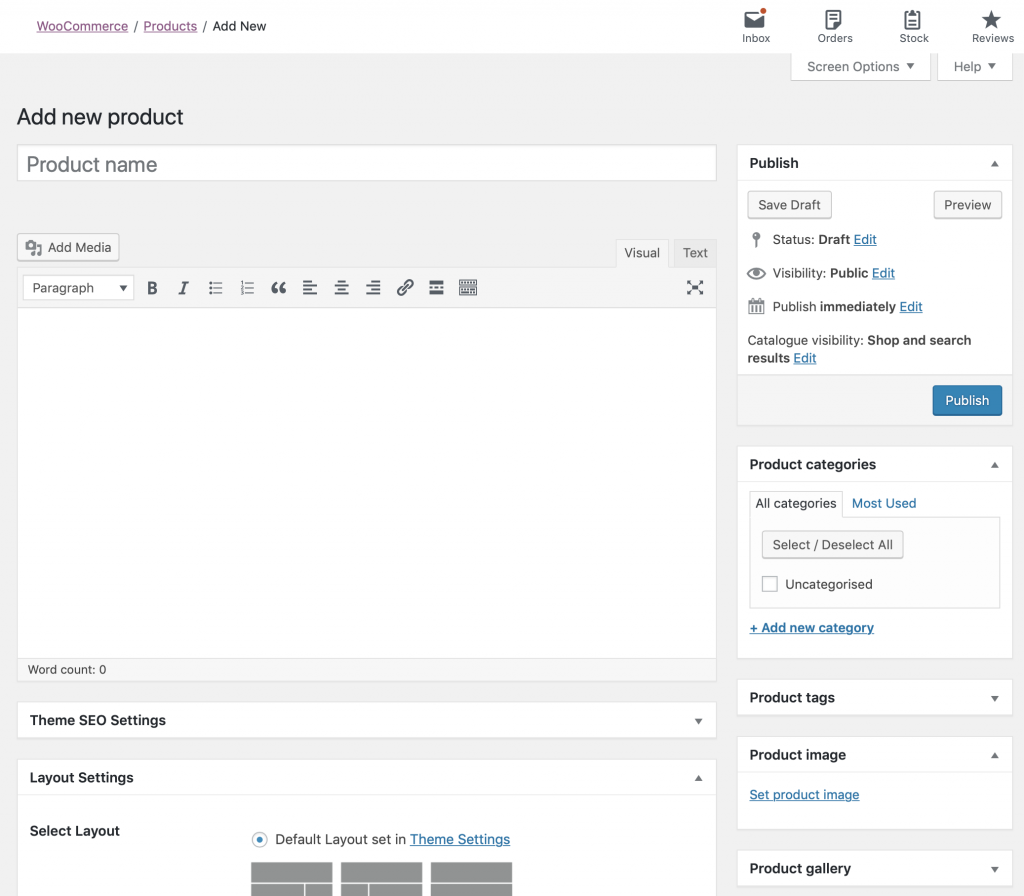
4. Here you can add the Product name at the top of the screen, just below that in the big text area you can write the Product description text.
5. On the right-hand side you’ll find the Product categories box, where you can select the product category.
6. Lastly, still on the right-hand side, you can assign the Product image – the same rules apply as anywhere else in WordPress: you can upload an image or select one from the Media Gallery
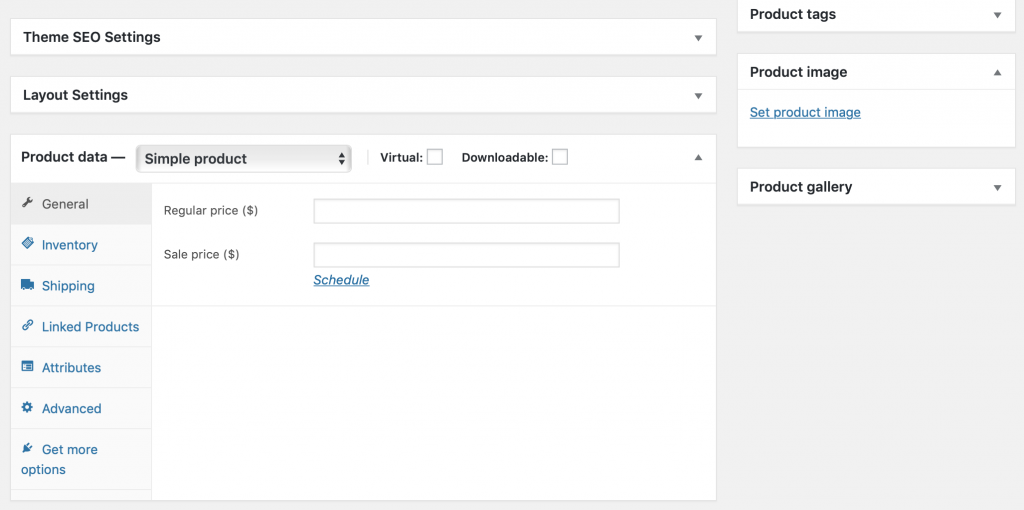
7. Scroll a bit down to see the Product Data section – here you can set the price of the product:
8. When done, scroll back up and press the Publish button on the right-hand side
9. All done! Your product is now live!


